This post may contain affiliate links. As an Amazon Associate, I earn from qualifying purchases.
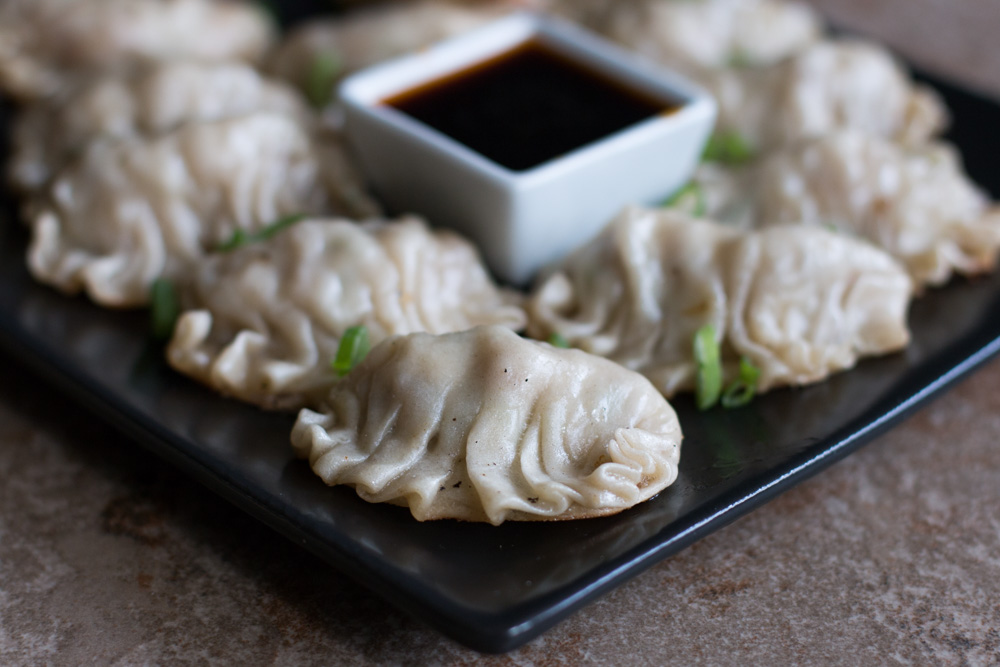
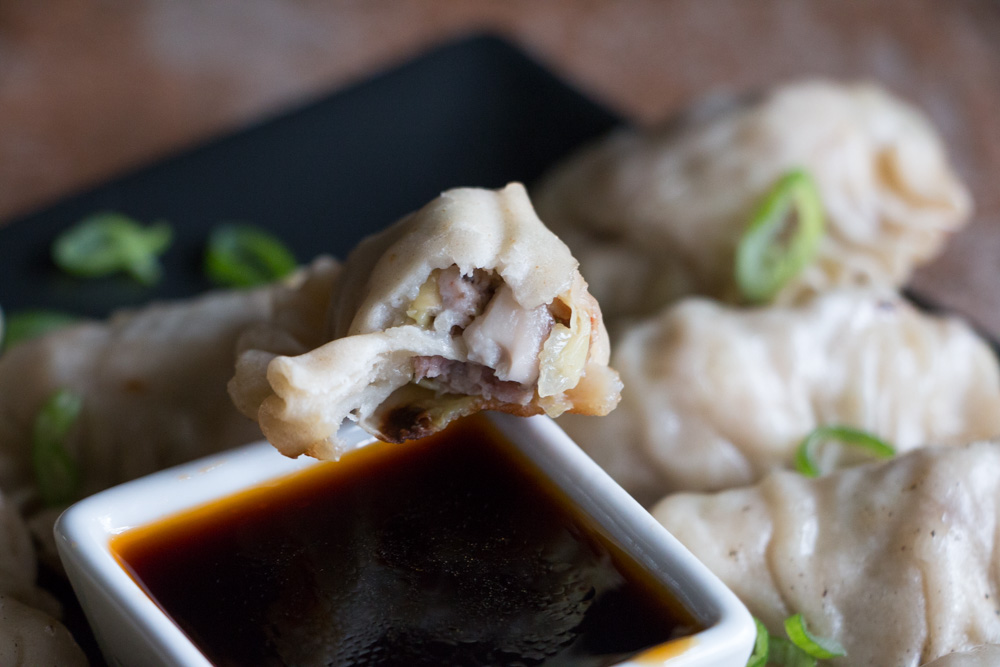
Today is all about breaking down how to make homemade gyoza. I talked about The Truck Stop on Tuesday’s Udon post and mentioned gyoza briefly. Gyoza are Japanese-style pork and cabbage dumplings and they’ve been on my list of Japanese foods I need to make for a long time. I have yet to eat gyoza in a restaurant that did justice to my memory.
And guess what? I did my first video!
It’s not great and I still have a ton to learn, but I’ve been meaning to do this for the longest time. Making homemade gyoza is what finally pushed me into doing it. As I was trying to find the words to describe how to put them together I became frustrated. No matter how I wrote, the instructions could be interpreted differently based on how people perceive space and direction.
The video shows how to make the gyoza wrappers and then how to stuff and pinch them together. I decided to do homemade gyoza wrappers because I was feeling homey and you can store them in the fridge for days. Just buy them if you don’t feel like making them from scratch.
The real sad thing about homemade gyoza is that usually buying prepared dough saves you tons of time and energy. Unfortunately, even when you cut out making the wrappers yourself, the real time intensive and dexterous part comes from stuffing, pinching, and cooking the gyoza, and there is no escaping that fact.
But I had to try because I’ve been let down too many times.
Making Homemade Gyoza
I actually loved making the wrappers. I got really absorbed in the task and it almost felt like yoga: I was totally present and got into a very nice rhythm. I didn’t enjoy the stuffing and crimping part nearly as much. I made the wrappers and stuffed them on the same day and decided to freeze the gyoza for later. I was way too tired to cook them and then take pictures.
I messed up my first batch of dough because I treated it like piecrust. Even though there was no butter, I was cutting the water in. The water was cold by the time I added it all and the dough became hard.
Instead, pour the water in slowly as you stir the flour and water together. Once all the water is added, form the mixture into a ball and start kneading it on a clean and dry surface immediately. The warmth of the water and the motion is what forms it into a firm and smooth ball of dough.
I made forty-five gyoza and still had about half of the filling left. In my inexperience, I couldn’t stuff the gyoza very well and ended up putting less in. I made fried-rice with the leftovers though so I didn’t mind. If you don’t like leftovers I would consider reducing the filling by half or making more gyoza (but 45 is already a lot).

I adapted the filling from this recipe over at Steamy Kitchen. The step-by-step photos are also very helpful.
The gyoza wrapper recipe and method I got from Just One Cookbook. Hop over there if you want to see a much more professional video on how to make gyoza wrappers.
Gyoza
Ingredients
Gyoza Wrappers (from Just One Cookbook)
- 2 cups flour measured and then sifted
- 1/2 teaspoon salt
- 1/2 cup boiled water
- potato starch
- 3 inch cookie cutter
- Or alternatively buy 1 package pre-made gyoza wrappers (about 45)
Filling (Adapted from Steamy Kitchen)
- 4 cups cabbage minced
- 1/2 teaspoon sea salt
- 1/2 pound ground pork
- 1 cup shiitake mushrooms diced, heaping
- 1/2 cup green onions diced (green part only)
- 2 cloves garlic minced
- 1/2 tablespoon ginger grated
- 1/2 tablespoon sake
- 1/2 tablespoon sesame seed oil
- 1/4 teaspoon crushed red pepper
Cooking (for each batch)
- 1 teaspoon sesame oil
- 1/2 cup water
Dipping Sauce
- 2 tablespoons soy sauce
- 1.5 tablespoons rice vinegar
- 1/2 teaspoon sesame hot chili oil
Instructions
Gyoza Wrappers
- Measure and sift the flour into a mixing bowl.
- Add the salt to the boiled water and mix until dissolved.
- Slowly, add the water to the flour, stirring with a fork or spatula. The dough will start to get clumpy and sticky. When it starts to form large balls/clumps, get in there with your hands, and form it into a ball. Place the dough on a clean and dry surface and knead it into a ball. The dough should begin to look smooth (it will be spiky and moist if there is too much water or dry and brittle if there is not enough). The key is the hot water. The dough will feel airy at first and like it won't stick together. Once you start kneading the hot water in it starts to pull together. Continue for about 10 minutes.
- Cut the dough in half and then roll out into two long logs about 1.5 inches in diameter. Wrap in plastic wrap and let sit for 30 minutes.
- Sprinkle your work surface with potato starch, unwrap the logs and cut them into 12 pieces. Take the pieces that are larger and rectangular in shape and cut them in half, making smaller square-sized pieces until you have 40 to 45. Cover with a damp towel.
- Take one of the small pieces, roll it into a ball in the palm of your hand, and press it into the work surface. Use a rolling pin to roll it into a circle, rotating the dough 90 degrees and flipping it over until it is larger than 3 inches.
- Take the cookie cutter and cut out a perfect circle. Sprinkle with potato starch and stack the wrappers, making sure to keep them covered with a damp towel. Once all of the dough has been rolled out, wrap them in plastic wrap and refrigerate for up to 4 days.
Filling
- Toss the minced cabbage with the salt and let sit for 10 minutes. Using a paper towel or cheesecloth, squeeze to cabbage to get rid of the excess water. Transfer to a large and deep mixing bowl.
- Add all the rest of the filling ingredients and mix it with your hands, massaging it until everything is distributed evenly. Form it into a ball and through it down for a couple of minutes to tenderize the meat.
Assembly
- Fill a bowl with cold water. On a dry and clean surface place one of the gyoza wrappers. Scoop a heaping teaspoon of the filling mixture and place it in the middle of the wrapper. Wet your finger in the water and trace it along the outer edge of half the wrapper (like a crescent moon-you're not wetting the edges of the whole circle).
- Fold the wrapper in half over the filling and pinch it in the center. Continue to pinch the middle with your left hand and start to pleat the wrapper with your right, working from the middle out. The back end stays flat while you pleat the top end, pulling it toward the center and pressing it against the flat back.
- After completing the pleats in the left-to-right direction, start pleating to the left of the pinched center, pulling the pleats toward the center and pressing them against the flat back. Place the completed gyoza on a parchment lined baking sheet.
- Repeat until all the gyoza wrappers are stuffed and pleated, about 40 to 45 in all.
Cooking
- Heat 1 teaspoon sesame oil in a large skillet (make sure it has a lid) on medium high heat. Once the oil is hot, place as many gyoza as you can in there with the pleat side up, making sure they aren't touching. Cook for 3 to 5 minutes until the bottoms are browned nicely.
- Pour in 1/2 cup water and put the lid on. Reduce heat to low and simmer for 5 minutes until the tops are noodle like and translucent. For frozen gyoza, cook 8 to 10 minutes. Remove the lid and turn the heat up to medium. Continue cooking until all the water has evaporated, about 2 minutes.
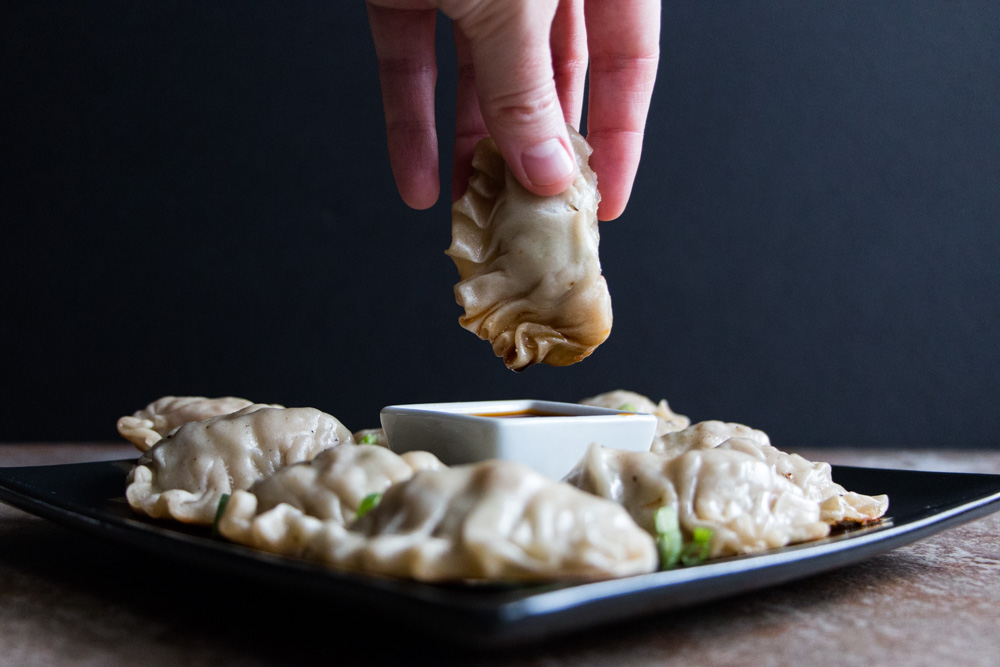
- Remove the gyoza with a spatula (or you can flip the skillet over, transferring the gyoza onto a plate). Repeat with the rest of the gyoza until done. Serve warm with the dipping sauce.
Notes
Related Products

Wow! I love gyoza but making the wrappers from scratch is something that I have not take on yet. I love that you did that! I don’t blame you for freezing them for later, I think that is one of the best things about recipes like this. Having them read y to go in the freezer but knowing you made them from cratch is the best. These look so tasty too!
They look so pretty! I’ve done gyoza so many times and I still can’t fold them like yours, and I agree stuffing has to be the most tiring part, definitely a two day recipe!
Trust me when I tell you there were quite a few ugly ones until I finally got the hang of it.
Oh I have wanted to try gyoza for the longest time!! Like you with bagels haha! And thanks for the video – will definitely help. Such a cool addition to a blog post to show us step-by-step. x
Oh bagels-you’ve reminded me I need to tackle those suckers! Anyway, I’m glad the video helped, mission accomplished!
I have always wanted to make homemade gyoza, and you make it look way easier than I thought it would be.
Thanks! It definitely helps to see something being done to help get past any intimidation you feel from trying something new.