This post may contain affiliate links. As an Amazon Associate, I earn from qualifying purchases.
Learn how to plan, put together, and throw an amazing gourmet DIY Gin Bar party for summer fun with your friends and family (mocktails included too)!
The time is finally here for the DIY Gin Bar post! After all the recipe posts over the past few weeks, now its time for me to share all the best tips and tricks for throwing a successful DIY Gin Bar party!


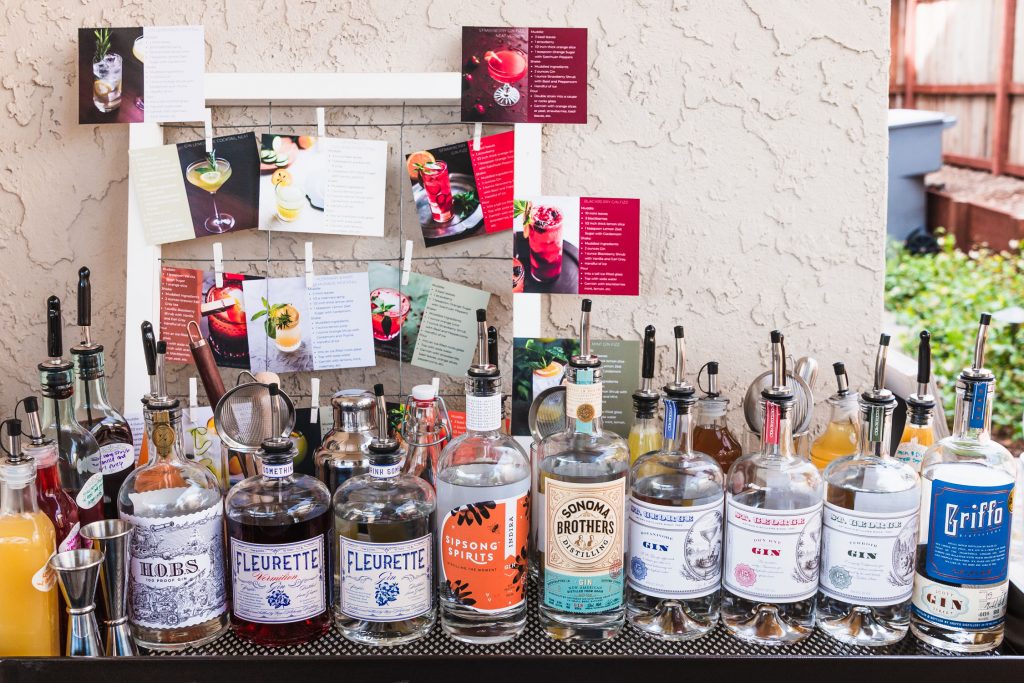
Northern California Craft Distilleries
I collaborated with six different distilleries for this series of posts:
- St. George Spirits (Alameda)
- Young and Yonder Spirits (Healdsburg)
- Griffo Distillery (Petaluma)
- New Alchemy Distilling (El Dorado Hills)
- Sipsong Spirits (Windsor)
- Sonoma Brothers Distilling (Windsor)
Northern California is such a spirited area and I wanted to highlight some of the fun and innovating craft spirits being made here. These distilleries generously gave me tours, tastings, and donated bottles of gin for these posts. But of course, all opinions are my own.
DIY Gin Bar Post Table of Contents
This is a long post so I’ve created a table of contents so you can skip to the areas you’re most interested in!
Introduction
Putting Together Your DIY Gin Bar
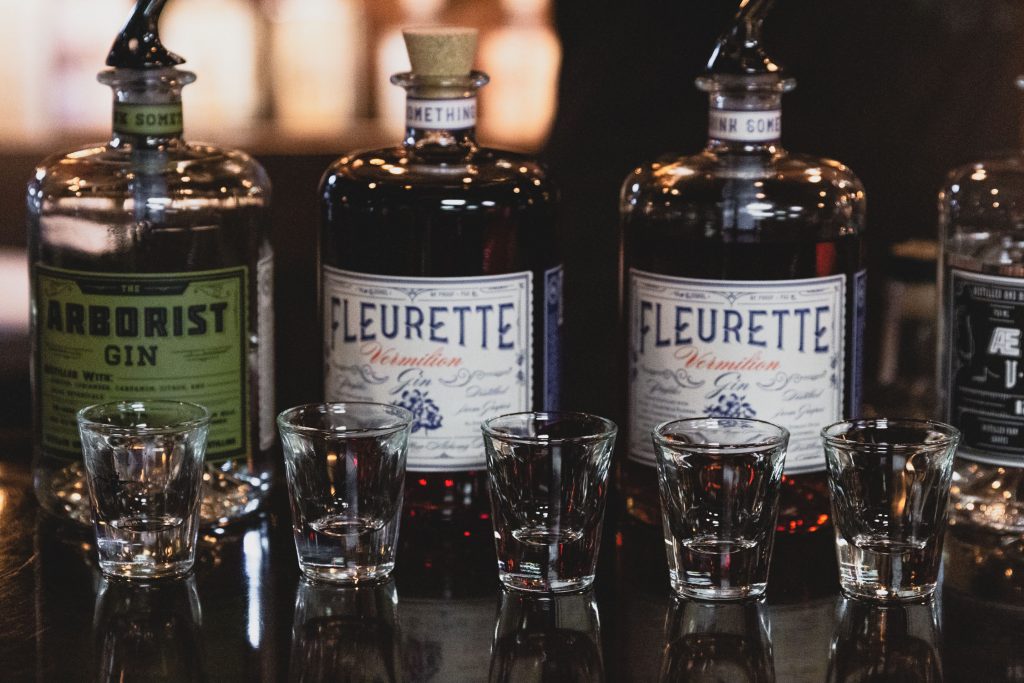
Pick a Theme and Choose Your Gin

You can’t throw a DIY Gin Bar party without the gin so take some time to think about why you’re throwing this party.
Obviously, you want to have fun, but what else?
- Try new gin brands you’ve never heard of before?
- Compare low, mid, and high priced gins?
- Learn more about different styles of gin?
- Explore locally made gins?
Picking a theme can help you narrow down what kind of gins you want to use.
I’m lucky that I live in such a spirited area (har har) so I picked a local theme. I wanted to highlight the local business and all the distilling innovation going on in the area around me.
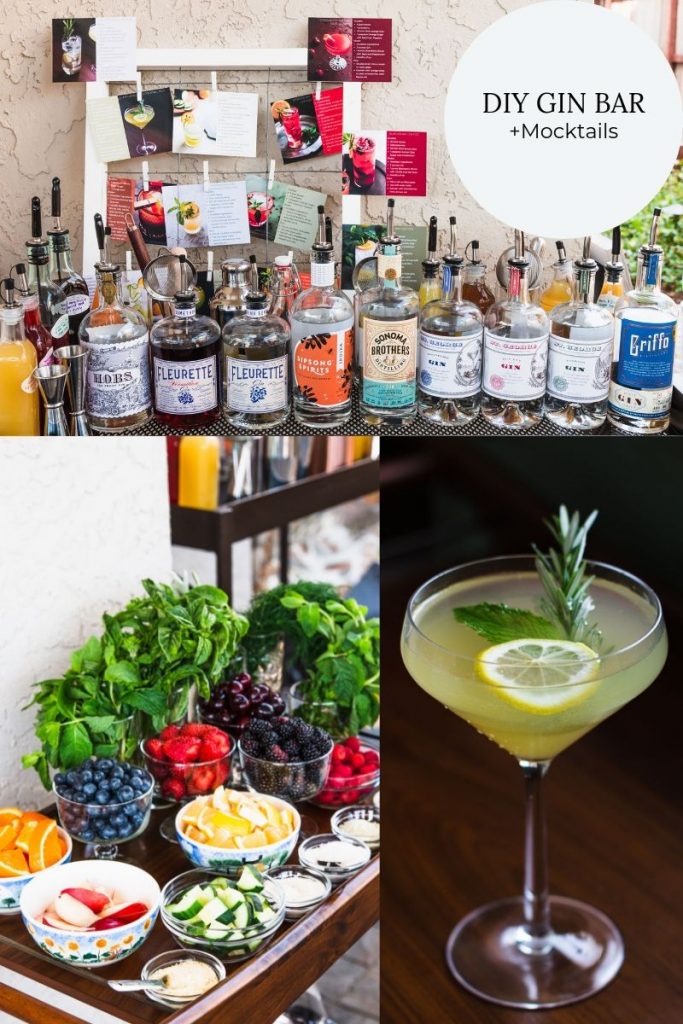
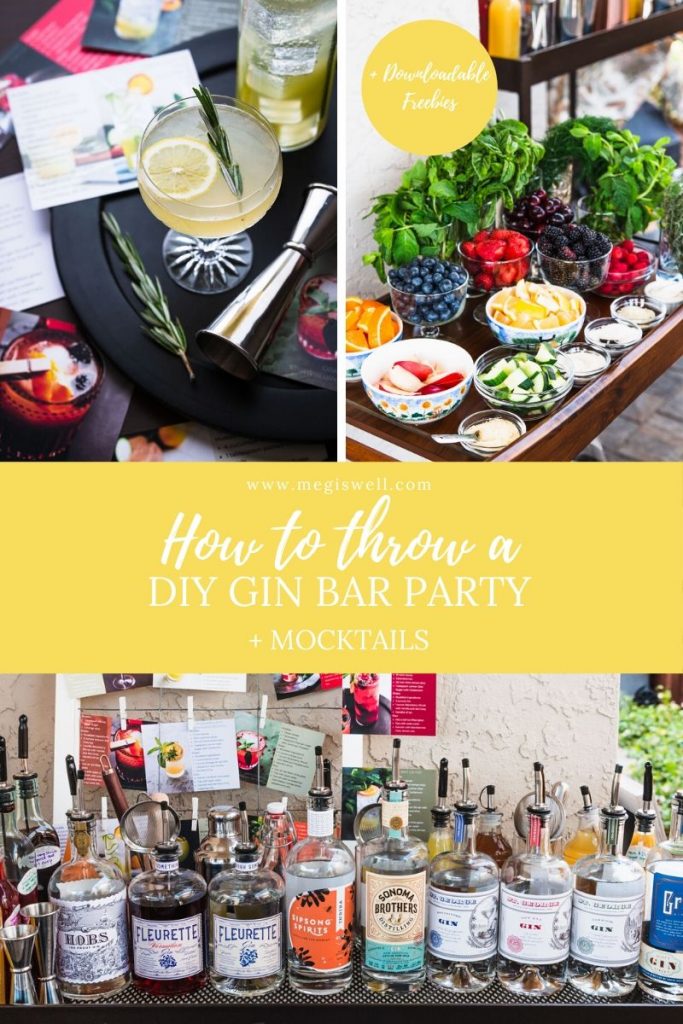
Below is a list of the local gins I used in the blind tasting and DIY Gin Bar as well as tasting notes for each gin.

Collaborating Distilleries
And here’s a little info about each of the distilleries that participated. I very much enjoyed visiting with, meeting, and learning from all these incredibly creative people.
Distillers are a mix of mad scientists, hands-on trial and error experimenters, recipe developers, inventors, and community builders who love what they do and love to share it with everyone.
St. George Spirits

I did a tour and tasting of St. George Spirits a long time ago and it was my first introduction to locally made spirits as well as my first time going spirit tasting.
Located in Alameda on Monarch Street, which is also known as Spirits Alley, St. George Spirits offers guided tastings and tours of the production floor (which is very impressive looking btw).
Young and Yonder Spirits

Young and Yonder Spirits is located in my old stomping ground, Healdsburg, where I used to work at the Healdsburg Museum and Historical Society.

Their space has a bar where you can taste their spirits and sip on craft cocktails. It also has a great vibe, with comfy couches, chairs, games, and is dog and child-friendly. I can easily imagine my friends and family choosing to hang out there for a while.
Griffo Distillery

Griffo Distillery is located in Petaluma in the Maker’s Alley District. They offer tours, tastings, and they also make craft cocktails. I highly suggest doing a full tasting of everything they have to offer (8 different spirits when I was there) because you won’t want to miss a thing.

They sell a very impressive collection of locally made cocktail ingredients (shrubs, bitters, etc.) and they also have cool cocktail kits. Chances are you’ll run into your fellow spirit tasters at one of the many other tasting and taprooms in the area (Lagunitas, Hen House Brewing, etc.)

New Alchemy Distilling

New Alchemy Distilling is located in El Dorado Hills (about 30 minutes away from Sacramento) and shares distilling space with Dry Diggings Distillery, which also has a tasting room where you can sample New Alchemy Distilling spirits.

They do tours, but it’s by appointment, so use their contact form if you want to inquire about doing a tour.
While there I got to try their new Fylleangst out of a beaker, which made me feel pretty cool. Fylleangst is their west coast interpretation of aquavit and I have to say even though this post is all about gin, I’ve got to get my hands on a bottle!
Sipsong Spirits

Sipsong Spirits is pretty much a one-woman show run by Tara Jasper and she distills her gin using Sonoma Brothers Distilling stills in Windsor and also has a tasting room there.
She is now making seasonal gins that you can only get access to if you are part of her Secret Sippers Club.
There is an Indira Gin Tea coming out soon, which allows you to experience all the flavor of the botanicals in her gin without the alcohol. This comes in handy for when she’s flying (yep she’s a pilot too) and I wish I had some handy when I was mixing mocktails!
Sonoma Brothers Distilling

Sonoma Brothers Distilling is located in Windsor and run by brothers Chris and Brandon.
Planning Stages
Get An Accurate Head Count for Your DIY Gin Bar
Pick how many people you want to invite, send your invitations (or create a Facebook event), and get an accurate head count.
A group of 5 to 8 is fairly easy to plan for and you won’t need to prep as much. You could go to the grocery store and pick up one box of club soda, some lemons, oranges, and limes, fresh fruit, and probably be good to go. It’s possible you might not even need to buy disposable cups-you could use your real glasses.

It starts getting harder to plan above eight people. You might need a bag of lemons, or even two. That one box of club soda might not be enough anymore.
Getting an accurate head count is one of the hardest parts of planning an event. Sometimes it requires being pesky, asking if a “maybe” is really a no or a yes.
As my group of friends gets older and have their own families, it gets harder and harder to plan things and have people show up.
Food
Decide whether or not you will be providing food as well or if you want to make your DIY Gin Bar a potluck. I decided to make it easier on myself and told everyone that it would be a potluck.
If you want more assurance that people will bring a good selection of food, you can even make a Google Drive document where people fill in what they will be bringing. I decided to hedge my bets and didn’t do that and luckily my friends came through (Chinese take out and banh mi sandwiches).
Set an RSVP Date

One of the lessons I learned this time is that I should have an “RSVP by X date” set up for two weeks before the event.
Originally I had 18 people down to come. So I did the math and figured out how much disposable cups, club soda, ice, oranges, lemons, limes, herbs, and fresh fruit I needed to buy.

In order for the disposable cups and club soda to arrive on time, I placed orders a week out from the event date based on my estimates for 18 people. But twelve people showed up and two just dropped by to hang out and didn’t have any drinks.
So I bought WAY too much of everything, especially since I tend to round up estimates because I’d rather have too much than run out of anything. Setting up an “RSVP by date” would have closed some of that gap.
DIY Gin Bar Math
Figuring out how much to buy can be very difficult. After making these drinks for my family for a few weeks, I had an idea of how much ice and club soda each drink used. I then did some basic math to figure out how much I should buy for the DIY Gin Bar.

Ice
To make one 16-ounce drink, I used about 1 cup of ice for shaking and 2 cups in the highball glass. So each drink approximately uses 3 cups of ice.
I decided to assume everyone was going to make 3 drinks each. This way, the people that are likely to have 1 or 2 drinks are balanced out with the few who might have 4 drinks.
- 17 people x 3 drinks each = 51 drinks
- 51 drinks x 3 cups ice for each drink = 153 cups ice = 1224 ounces
- There are 16 ounces in a pound so 1224 ounces = 76.5 pounds
I felt like this was too much and there is a difference between refrigerator ice and bagged ice. In the end, I just went with how much ice I could fit in my freezer and bought 34 pounds of ice (One 20 pound bag + Two 7 pound bags). I think this would have been perfect if 18 people had shown up.
After the fact, I found a really nice estimator, Home City Ice Calculator, that ended up being fairly accurate, so I recommend using it to help decide how much ice to buy.
Soda Water
When I was making drinks for my family, a 10-ounce bottle of soda water was used for 2 drinks.
- 17 people x 3 drinks each = 51 drinks
- 51 drinks/ 2 drinks = 25.5 = 26 (10-ounce) bottles of soda water
Citrus (Lemons, Oranges, Limes)
For a party of 5 to 8, I would buy a one to one ratio of citrus to guests (for example 5 lemons, 5 oranges, and 5 limes). You will have extra leftover.
But how much is leftover will depend on:
- Your group of friends
- How many drinks they will have
- Which citrus they end up reaching for the most
- The quality of the citrus: sometimes lemons, limes, or oranges won’t have as much juice as you would like. For example, I can’t get a hold of good limes. No matter where I buy them, they are always rock hard and practically have no juice.
I think it’s more cost-effective after you get over 8 guests to buy the citrus in bulk, like at Costco.
Putting Together Your DIY Gin Bar
Labels

Because you made everything, you know what everything is. But your guests won’t. Labels are important so people know what all the goodies in front of them are.
I used Ball Dissolvable Canning Labels to label all my bottled shrubs, syrups, and citrus juices. The only items I forgot to label were the infused sugars, which caused a lot of people confusion (my bad).
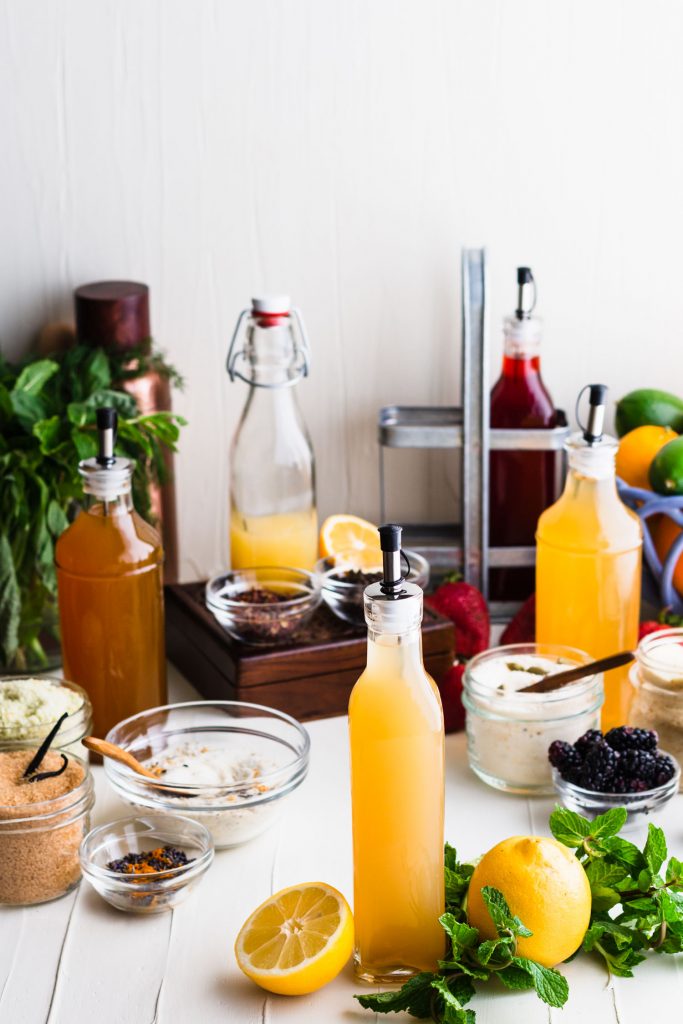
Glass Bottles and Pour Spouts

Mason jars are really useful for storing food but not so much for pouring small amounts of shrubs or syrups into jiggers. I bought two sets of liquor pour spouts so that I could use them on the gin bottles, shrubs, and syrups. This made it easier to pour and measure out liquids.
I gathered all my glass bottles that could fit the spouts and ended up having to buy two more oil dispenser bottles. If you look around your house, you can probably find bottles that will work.
For example, I saved club soda bottles, cleaned them out and rubbed the labels off to put juices and syrups in them.
Bar Kit:
You might already have a complete bar set up or because of how many people are coming, you might need to add another set of tools.
I wanted one cocktail shaker, muddler, jigger, and strainer to be for mocktails only. And then I wanted two sets for the cocktails so people wouldn’t have to wait around too long.
If you have no need for the extra sets after you throw the party, you could offer them up as prizes for the winners of the blind gin tasting.
What I Used
Fine Mesh Sieve Stainless Steel Cocktail Strainer – I’ve been using a repurposed tea strainer that doesn’t have a handle for my cocktails so it was about time I bought one of these.
Stainless Steel Cocktail Muddler – I have a wooden one that I bought mostly for pictures. It stains and is really hard to clean because stuff gets stuck in the teeth. This stainless steel cocktail muddler is much easier to clean and muddles better as well.
Stainless Steel Cocktail Shaker – I get extremely frustrated with cocktail shakers. My hands are small and I sometimes find it hard to grip shakers. Even though this one is fairly tall, the upturned lip/ledge makes it really easy to hold and shake. It still does stick after it has been shaken with ice but apparently, you need to pull the top off instead of twist.
1 & 2 ounce Japanese Style Stainless Steel Bar Measuring Jigger – I’m a two-ounce drink crafter. A shot is technically 1.75 ounces but I find it easier and tastier to make drinks crafted by two ounces. But this jigger has ½ ounce, ¾ ounce, and 1.5-ounce markers too for when you need those measurements.
Ice Scooper – Ice usually ends up melting together, making it harder to grab with your bare hands. Having an ice scooper that you can use to both break apart the ice and scoop ice into the cocktail shaker and glasses is very helpful (and easier on your hands).
Drink Ware

Enough people were coming that I needed to use disposable cups, so I bought three different sizes:
- 1-ounce shot cups for blind gin tasting
- 8-ounce cups for the mocktails or neat versions of the cocktails
- 14-ounce cups for the fizzy cocktails
These cups were able to withstand muddling without cracking and look nice.
However, you could probably get away with just buying the 8-ounce cups. I’m really meticulous in my drink crafting and the 14-ounce cups were closest to the highball glasses I crafted the recipes with. By using them, you get the best drink/soda ratio.
But my guests kept reaching for the 8-ounce cups and they didn’t seem to notice the difference.
Things You Can Make Ahead
Not everything has to be done the day of the event. Here are some things you can make and prepare before the big day.
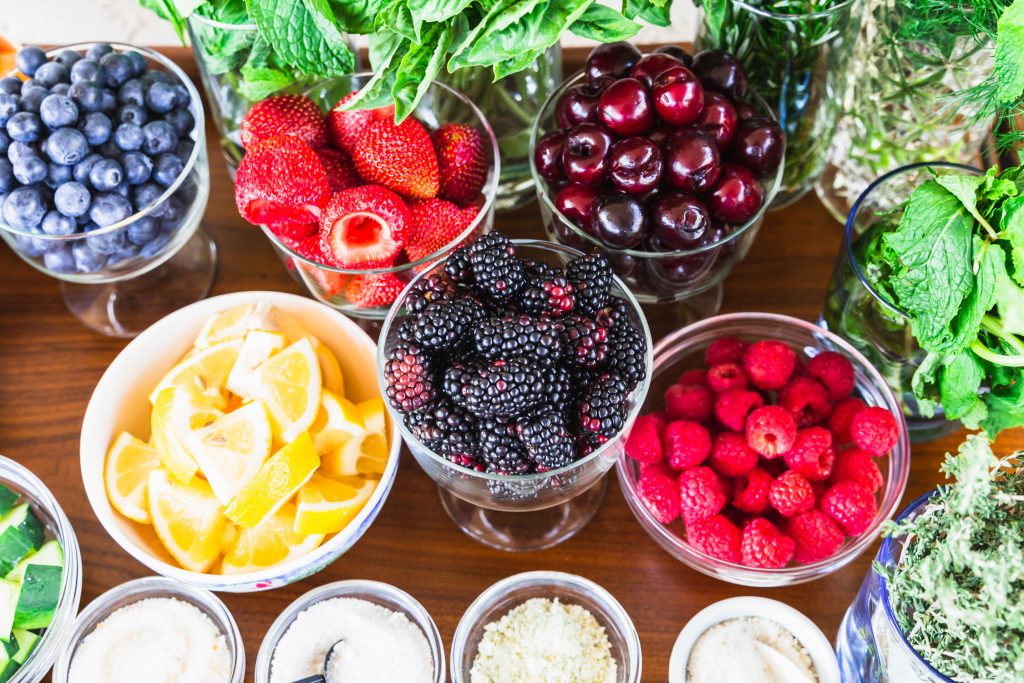
The Shrubs
Making the shrubs can be done 6 to 8 weeks in advance. It can be hard to estimate how much to make, but for a party of 15 to 20, I would suggest a double batch of each.
Inevitably, one will run out much faster because there always ends up being a crowd favorite, but that’s okay.
Here’s the list of shrubs you can make ahead for your DIY Gin Bar:
- Strawberry Shrub with Basil and Peppercorn
- Blackberry Shrub with Vanilla and Earl Grey
- Lemon Shrub with Cardamom and Mint
- Orange Shrub with Cardamom and Thyme
- Orange Shrub Recipe with Yunnan Tea and Szechuan Peppers
The Infused Sugars
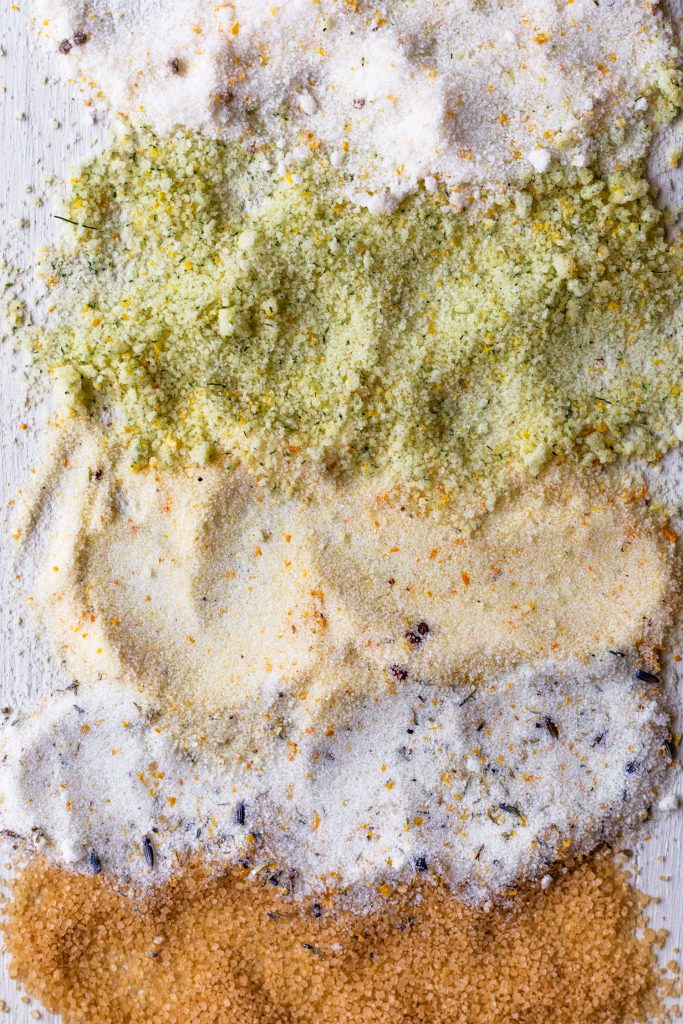
You can also make the infused sugars far in advance and you won’t even need that much, even with a lot of people coming to your DIY Gin Bar party. Here’s the list of infused sugars you can make ahead of your DIY Gin Bar:
- Vanilla Bean Sugar
- Orange Sugar with Szechuan Peppers
- Lemon Zest Sugar with Cardamom
- DIY Citrus Sugar with Lemon and Dill
- Lemon and Lavender Infused Sugar
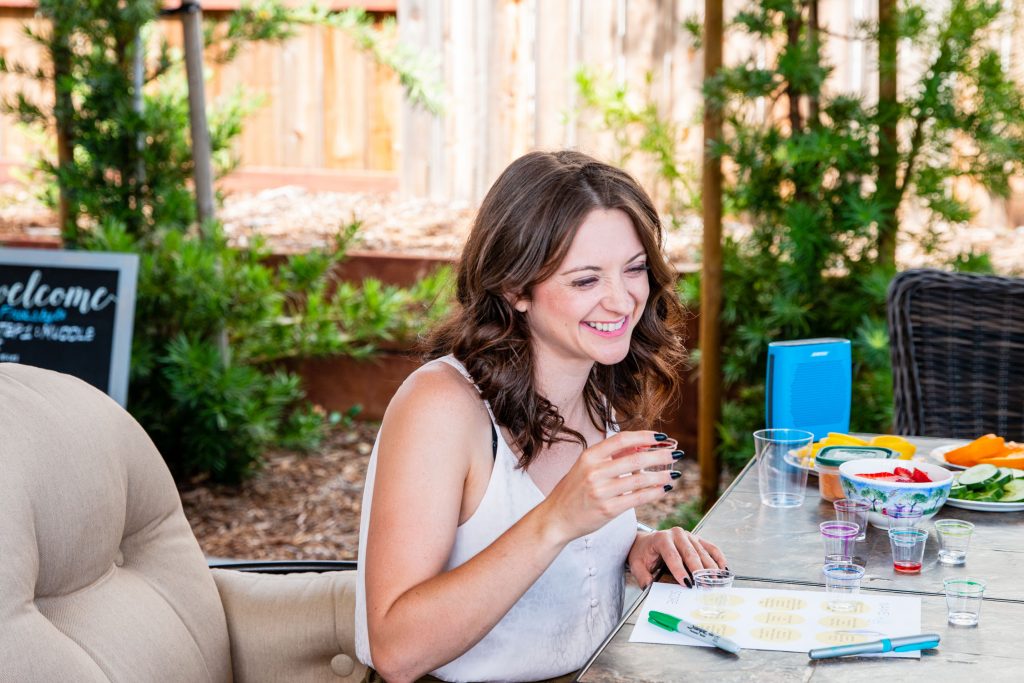
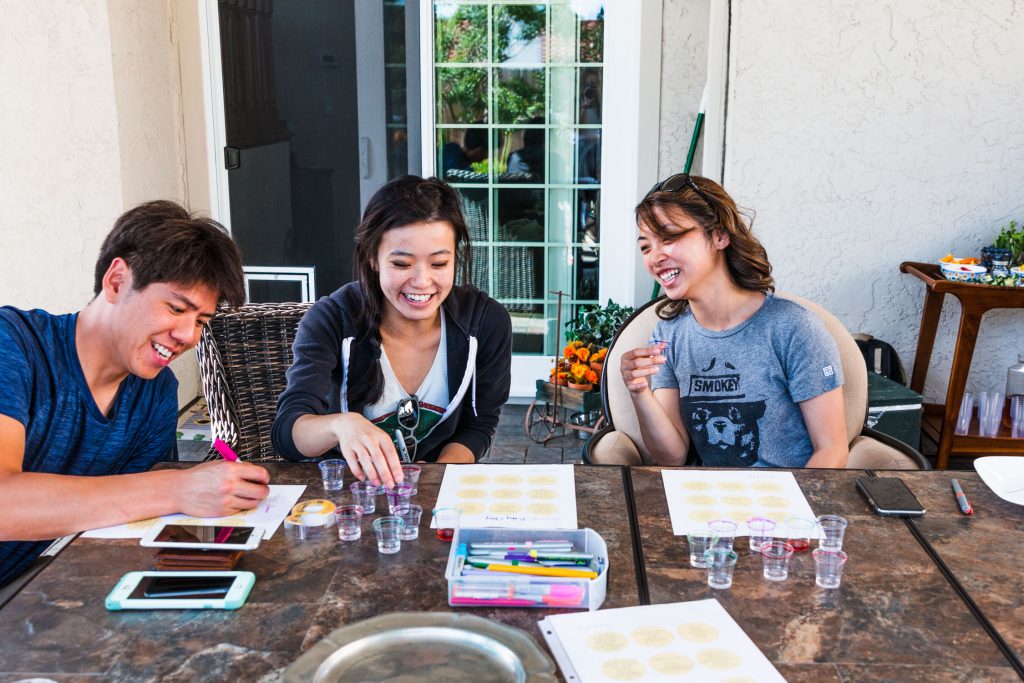
Blind Tasting Sheets and Shot Glasses

One of the downloads included in this post is a PNG file that you can upload into Canva. There, you can fill out the circles with text that describe the gins you are using in the blind tasting.
I used different color permanent markers to mark the 1-ounce plastic shot glasses and then made a color key. But it was really hard for me to score people’s guesses this way and people couldn’t really remember which gin they liked the best.

Blind Tasting Worksheet 
Blind Tasting Answer Sheet
I would recommend having an answer sheet like this one to hand to people so they can score themselves. This means less work for you but also lets people know which gins they liked best.
Choose the permanent marker colors, assign a color to a gin, mark the glasses, and then use a corresponding color on the text description, circle color, or highlight (whatever you prefer).
Recipe Cards

Print and cut out the recipe cards ahead of time. When people are making their own drinks, having recipes they can follow is great. Some won’t use them but it’s nice to have the option.
I created these on Canva and printed them at my local FedEx. They have this neat water-resistant paper that is perfect for recipe cards. I’ve included crop marks on the PDF document to make it easier to cut.
Things to Do the Day Of
Peeling

Adding a citrus peel for garnish isn’t only about looks. The aroma from the peel has a big impact on taste and can really elevate a cocktail.
The day of the DIY Gin Bar, peel all the citrus you will use for fresh juice and keep the peels in an airtight container. When paring or using a peeler, make sure to leave the white pith behind-it can add an unpleasant bitterness to your drinks.
It’s preferable to do this step right before a cocktail is served, but for the purpose of a DIY Gin Bar, it’s not practical. Plus vegetable peelers can be just as dangerous around drinking (and sober) people as knives (just ask my fingers).
Juicing

If there’s one thing I hate to do while I’m making drinks, it’s juicing the lemons, limes, and oranges. It always adds so much extra time and it makes a mess.
Have a good quantity of citrus juices already squeezed and bottled. Use the lemons, oranges, and limes that you peeled for drink garnishes.
This is best done the day of. Freshly juiced citrus is best fresh!
Slicing

It would probably be a good idea to keep sharp objects out of reach of people drinking, don’t you think?
Not to mention it adds more time and the juice build up can make your bar a mess. Considering this, it helps to have a lot of citrus fruits already sliced up for both muddling and garnishing.
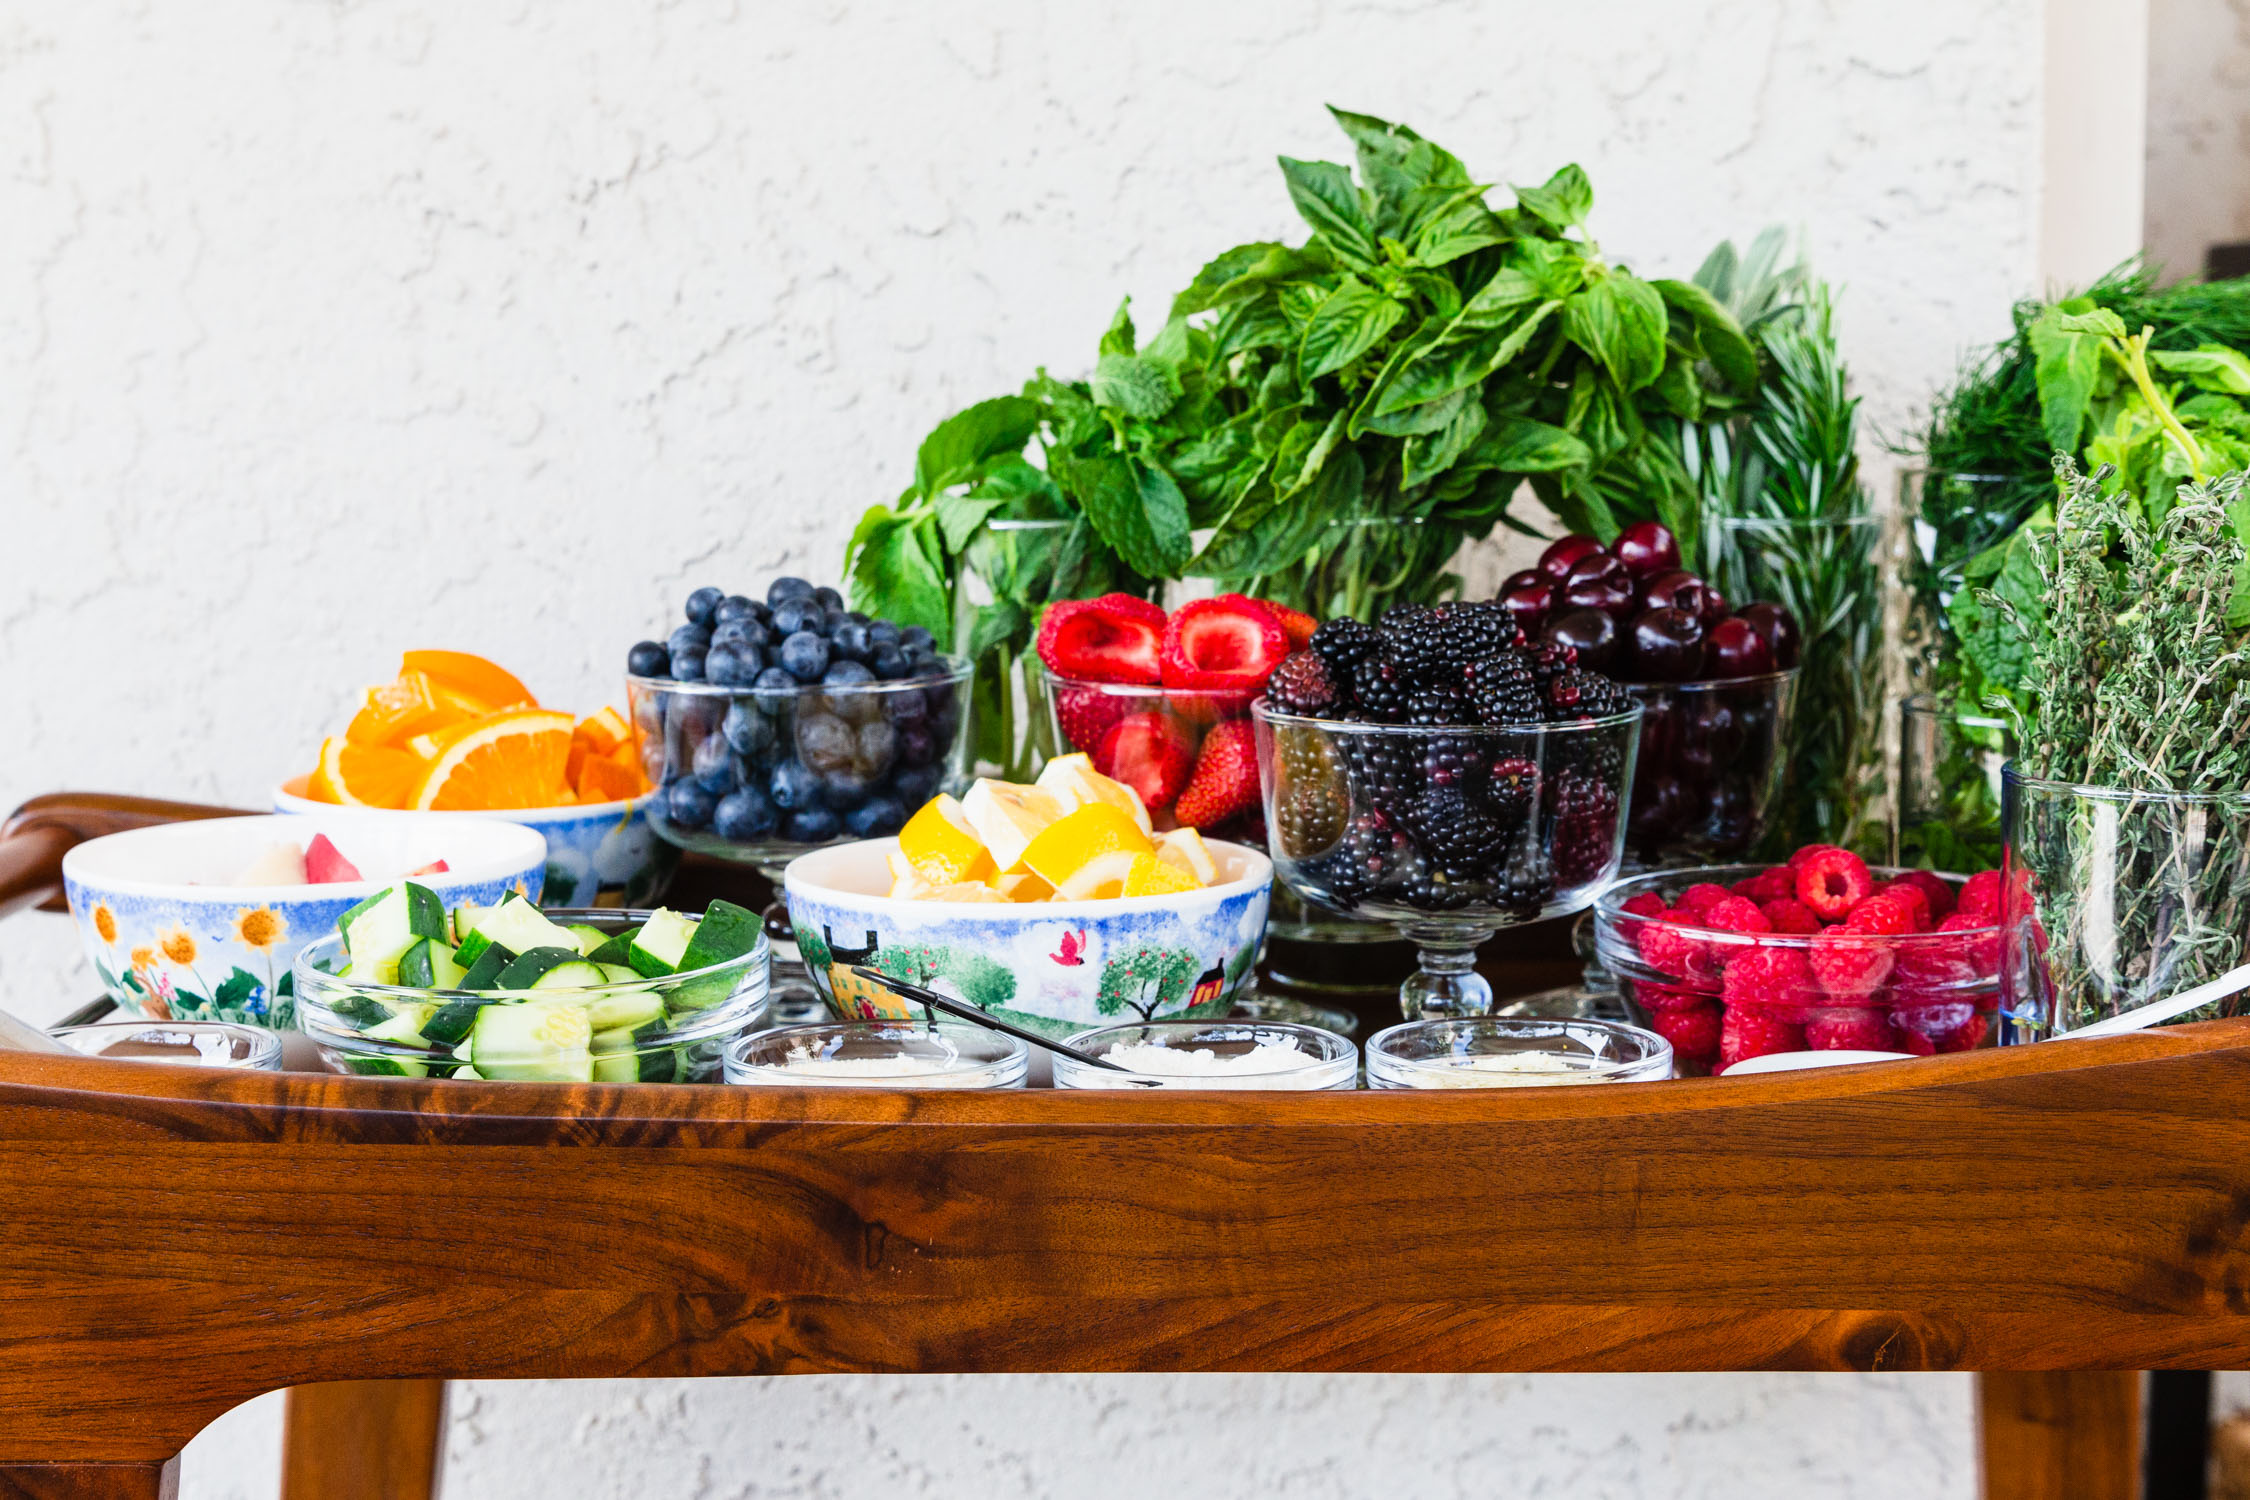
Set-Up

Your set up will depend on what kind of tools and space you have available to you. But here are some general tips and tricks that you can keep in mind.
- I began setting up an hour before. This doesn’t include the time spent cleaning and sprucing up the area or going to the farmers market and grocery store to buy fresh produce, herbs, and ice.
- An hour before guests were to arrive is when I started peeling, juicing, and bottling the lemons, oranges, and limes. It wasn’t until the last 15 minutes that I started transferring everything outside.
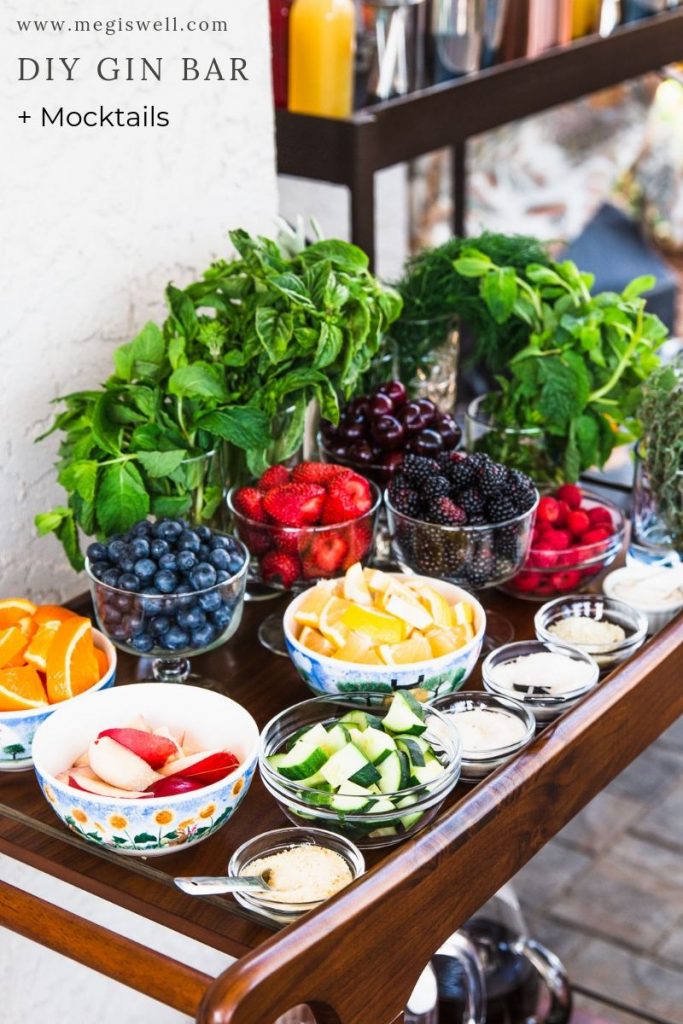
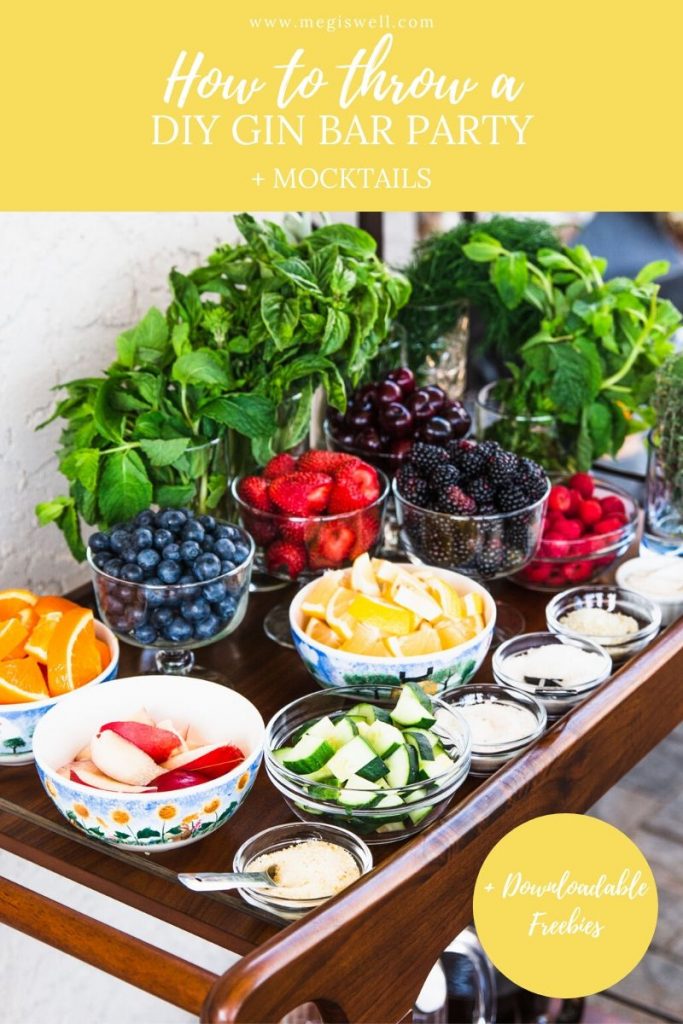
- Put all the herbs in glasses or containers filled with water. This will help keep them fresh longer.
- Have a cooler to store the ice and club soda in.
- Keep all the muddling ingredients in one area and then all the liquid ingredients in another. I had a smaller bar cart packed with all the herbs, fruit, and infused sugars that are muddled together before adding any liquids. The larger bar cart had all the gin, shrubs, and syrups that are added after muddling.
Outside Vs. Inside

If you’re throwing the DIY Gin Bar inside it’s a lot easier for each guest to clean the cocktail shaker, muddler, and jigger they used for their cocktail or mocktail. They simply have to dump everything in the trash and then rinse at the sink.
But if you’re throwing your party outside and don’t have an outdoor sink, it becomes more difficult. I set up a dump and rinse area where guests could dump the contents in their cocktail shakers and then rinse everything in a large punch bowl filled with water. The punch bowl had to be dumped and refilled multiple times but it still worked pretty well.

I set up the blind tasting on a table but because it was outside and windy, the tasting sheets kept blowing away and knocking over the plastic shot glasses. Double-sided tape saved the day though and made the sheets stay in place while my guests went through the tasting.
Freebies
I hope you enjoyed this in-depth DIY Gin Bar post! Subscribers to my email list get a couple of free downloads with this post (+access to all other downloads in my resource library):
- DIY Gin Bar Checklist for helping you plan your own party
- Blank PNG files of a blind tasting score and answer sheet that you can upload into Canva or other design app and fill out with the gins you choose to use
- PDF file containing high-quality printable recipe cards (crop and bleed marks included for easy cutting) of all the cocktail and mocktail recipes (see list below for all the recipes included)
- Strawberry Gin Fizz
- Blackberry Gin Fizz
- Mint Gin Fizz
- Lemon Gin Fizz with Cucumber and Dill
- Orange Gin Fizz
- Gin Lemonade Cocktail
- Orange-Basil Strawberry Mocktail
- Vanilla Earl Grey Blackberry Mocktail
- Sparkling Basil Lemon Mocktail
- Lemon-Dill Cucumber Mocktail
- Rosemary & Mint Lemonade Mocktail